Back to TheWorxHub for Senior Living Main Menu
Batch Editing
TheWorxHub makes managing your data easy by providing various batch editing tools.
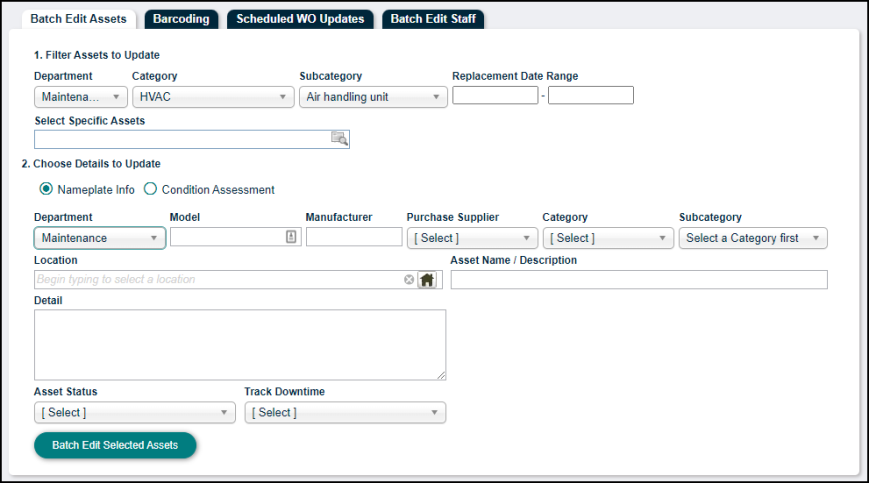
Batch Edit Assets
- Click on the Actions option from the navigation menu.
- Filter the list of available assets to update by Department, Category, Subcategory, or Replacement Date Range.
- Click on the asset picker icon (
 ) to open the Select Assets window.
 - Check the box next to any assets you would like to edit, then click Select Assets.
- In the Choose Details to Update step, select the type of information you would like to edit:
- Nameplate Info
- Condition Assessment
- The fields available to edit will vary based on your selection. Enter any information that needs to be changed, and click Batch Edit Selected Assets.
Batch Edit Assets to Track Downtime
You can edit multiple assets at the same time so that you can track downtime for them. This is much more efficient that editing each asset individually.
-
Click on the Actions option from the navigation menu.
- Filter the list of available assets to update by Department, Category, Subcategory, or Replacement Date Range.
- Click on the asset picker icon () to open the Select Assets window.
- Check the box next to any assets you would like to edit, then click Select Assets.
- In the Choose Details to Update step, select Yes from the Track Downtime drop-down menu.
- Click Batch Edit Selected Assets.
Scheduled WO Updates
- Click on the Actions option from the navigation menu, then click on the Scheduled WO Updates tab.
- Use the filter and search feature to narrow down the scheduled work orders in your account, or simply click Search Now to bring up a list of all scheduled work orders.
- Check the box next to any scheduled work orders you would like to update and then click either the Batch Edit, Batch Assign, or Batch Terminate link.
Batch Edit
This is where you can edit basic information about the scheduled work order, such as Department, Location, or Details. *Note: Batch updating scheduled work orders' frequencies cannot be done using this feature.
- Enter any information that needs to be updated, then click Save.
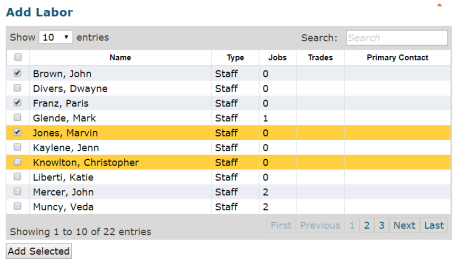
Batch Assign
The Batch Assign feature allows you to choose who will be working on the selected scheduled work orders. This is helpful if the same worker(s) will be responsible for multiple scheduled work orders.
- Check the box next to the name of the worker(s) who will be assigned the scheduled work orders.
- Click Add Selected.
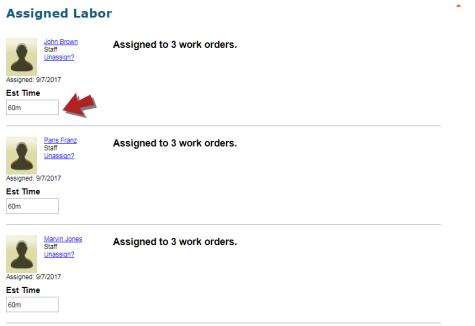
- Enter an Est. Time in minutes if needed and click the Save link.
- Click Close.
|
|
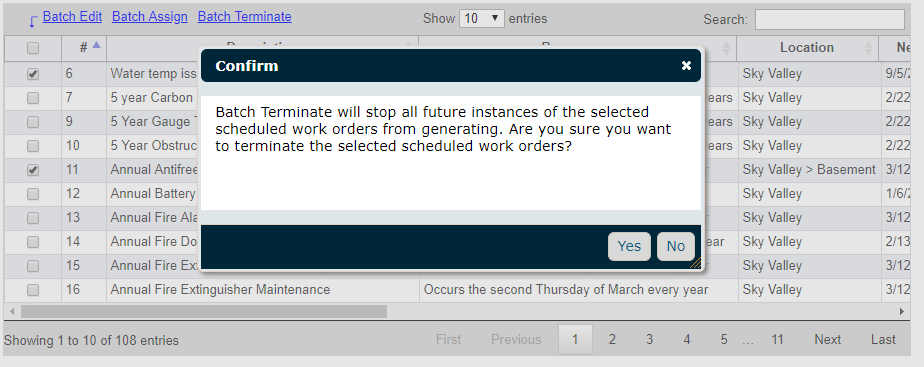
Batch Terminate
The Batch Terminate feature allows you to select multiple Scheduled Work Orders and terminate them all. This will prevent all future work orders from generating for the selected Scheduled Work Orders.
- Click Yes to confirm termination of the selected scheduled work orders.
Batch Edit Staff
- Click on the Actions option from the navigation menu, then click on the Batch Edit Staff tab.
- Use the filter and search feature to narrow down the staff list, or simply click Search Now to bring up a list of all staff members in your account.
- Check the box next to any staff member whose information you would like to update and then click either the Batch Edit or Batch Deactivate link.
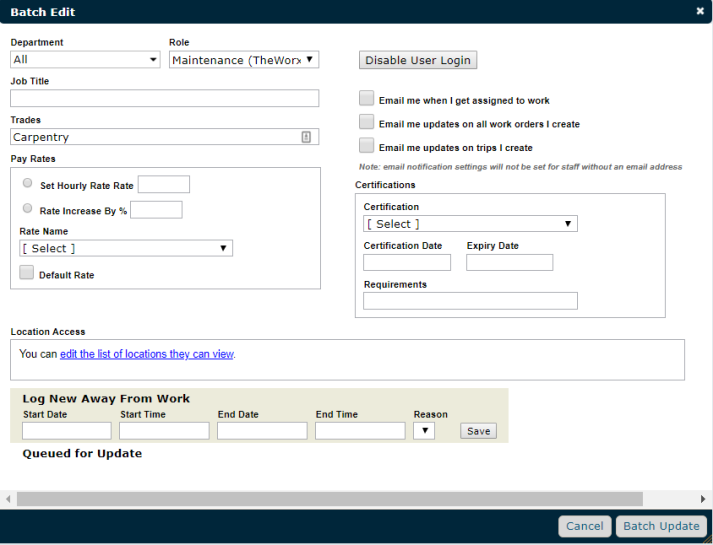
Batch Edit
This is where you can edit basic information about the staff members, such as job information, pay rates, email notifications, or time away from work.
- Enter any information that needs to be updated, then click Save.
Batch Deactivate
This is a simple feature that allows you to quickly deactivate multiple users at one time.
- When you click the Batch Deactivate link, a pop up will appear confirming that you want to deactivate the selected users.
- Once deactivated, the users will be removed from all assignable areas, and hidden in search results. Their work history, however, will remain reportable.
